OpenFeign框架原生应用(二)进阶使用
SpringCloud OpenFeignadmin 发布于:2024-07-26 11:02:52
阅读:loading
前面一篇《OpenFeign框架原生应用(一)简单示例》文章介绍了使用OpenFeign框架的原生应用,介绍了Maven坐标依赖和使用多种请求方式进行参数传值和接口调用的示例演示,始终觉得只是入门程度,只有使用到了文件上传和文件下载才能算是真正略有水平的进阶,所以本次的实现为包含文件上传和文件下载的接口调用实现。
import ...;

/**
 * 简单Api测试
 * @author chendd
 */
@RestController
@RequestMapping(value = "/api/advance" , consumes = MediaType.ALL_VALUE , produces = MediaType.APPLICATION_JSON_VALUE)
public class AdvanceApiController {

    @GetMapping(value = "/download" , produces = MediaType.APPLICATION_OCTET_STREAM_VALUE)
    public void download(HttpServletResponse response) throws IOException {
        response.setContentType(MediaType.APPLICATION_OCTET_STREAM_VALUE);
        response.setHeader(HttpHeaders.CONTENT_DISPOSITION , ContentDisposition.attachment().filename("AdvanceApiController.class").build().toString());
        try (ServletOutputStream outputStream = response.getOutputStream();
             InputStream inputStream = getClass().getResourceAsStream("AdvanceApiController.class")){
            StreamUtils.copy(inputStream , outputStream);
        }
    }

    @PostMapping(value = "/upload_param" , consumes = MediaType.MULTIPART_FORM_DATA_VALUE , produces = MediaType.APPLICATION_JSON_VALUE)
    public Map<String , Object> uploadParam(@RequestPart("files") List<MultipartFile> files ,
                                       @RequestParam Integer id,
                                       @RequestParam String name,
                                       @RequestParam List<String> nikeNames
                                       ) {
        Map<String , Object> paramMap = new HashMap<>(16);
        paramMap.put("id" , id);
        paramMap.put("name" , name);
        paramMap.put("nikeNames" , nikeNames);
        if (files != null && !files.isEmpty()) {
            paramMap.put("files" , files.stream().map(MultipartFile::getOriginalFilename).collect(Collectors.toList()));
        }
        return paramMap;
    }

    @PostMapping(value = "/upload_body" , consumes = MediaType.MULTIPART_FORM_DATA_VALUE , produces = MediaType.APPLICATION_JSON_VALUE)
    public Map<String , Object> uploadBody(UploadParam param) {
        Map<String , Object> paramMap = new HashMap<>(16);
        paramMap.put("id" , param.getId());
        paramMap.put("name" , param.getName());
        paramMap.put("nikeNames" , param.getNikeNames());
        if (param.getFiles() != null && !param.getFiles().isEmpty()) {
            paramMap.put("files" , param.getFiles().stream().map(MultipartFile::getOriginalFilename).collect(Collectors.toList()));
        }
        return paramMap;
    }

}
特别说明
(1)文件下载的是当前Controller.class文件;
(2)文件上传的参数传递有两种方式,第1种是@RequestPart接收文件类型参数,使用@RequestParam接收普通参数,含单个参数和集合类型的多个参数;
(3)文件上传的参数传递有两种方式,第2种是使用对象来接收包含文件类型参数,不需使用注解来接收参数,所有参数均在对象内部;
(4)文件上传接口将输出传递过来的各个参数和上传文件的名称信息;
(1)定义测试接口的初始化方法,声明各个API的细节,参见前一篇文章的更多描述;
@RunWith(JUnit4.class)
public class AdvanceHttpClientTest {

    private AdvanceHttpClient httpClient;

    @Before
    public void init() {
        ObjectMapper objectMapper = new ObjectMapper();
        objectMapper.configure(SerializationFeature.FAIL_ON_EMPTY_BEANS, false);
        final Feign.Builder builder = new Feign.Builder()
                .contract(new SpringContract())
                .client(new OkHttpClient(OkHttpClientConfig.getHttpClient()))
                .encoder(new HttpFeignFormEncoder(objectMapper))
                .decoder(new HttpFeignFormDecoder(objectMapper))
                .errorDecoder(new HttpFeignFormError())
                .logger(new Slf4jLogger())
                .logLevel(Logger.Level.FULL);
        httpClient = builder.target(AdvanceHttpClient.class, "http://127.0.0.1:8080");
    }
}
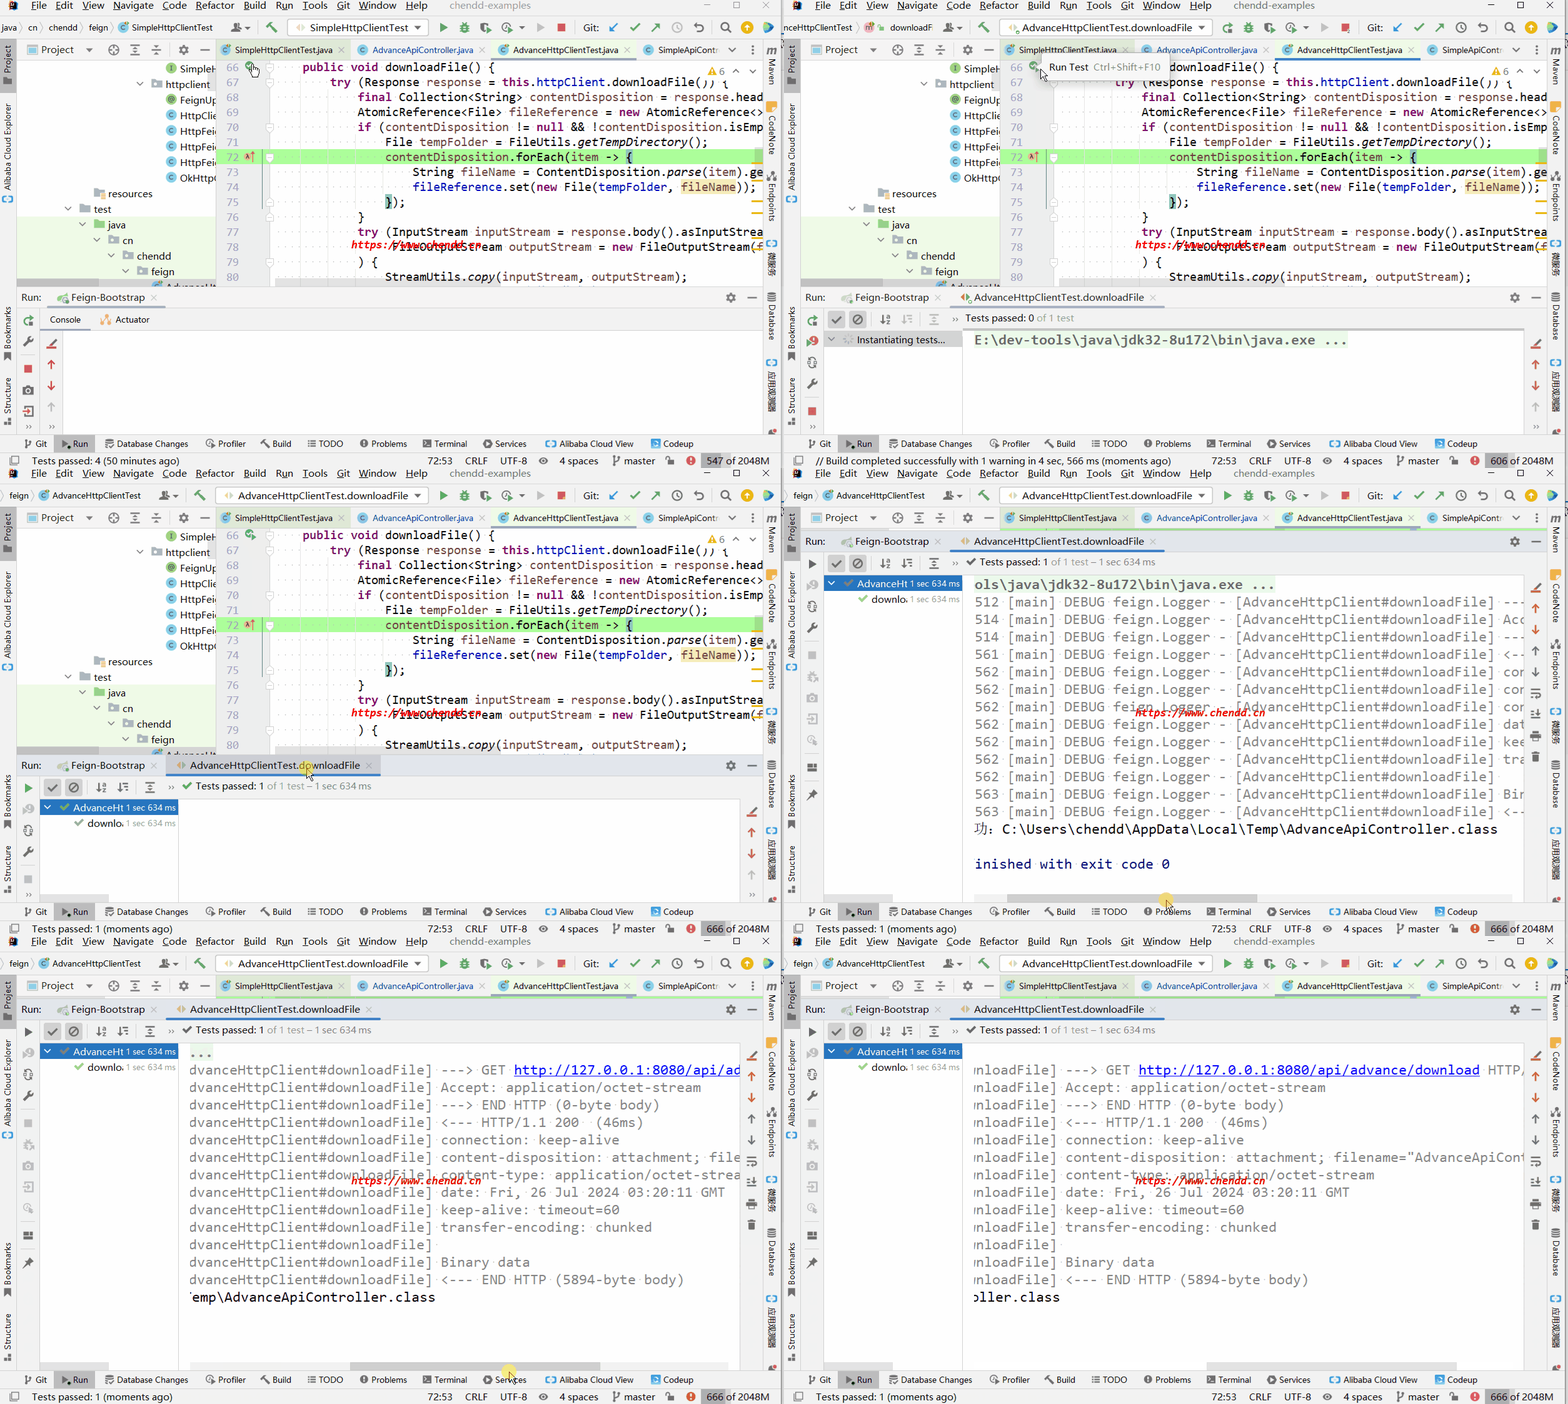
(2)测试文件下载接口
@Test
public void downloadFile() {
    try (Response response = this.httpClient.downloadFile()) {
        final Collection<String> contentDisposition = response.headers().getOrDefault(HttpHeaders.CONTENT_DISPOSITION, null);
        AtomicReference<File> fileReference = new AtomicReference<>();
        if (contentDisposition != null && !contentDisposition.isEmpty()) {
            File tempFolder = FileUtils.getTempDirectory();
            contentDisposition.forEach(item -> {
                String fileName = ContentDisposition.parse(item).getFilename();
                fileReference.set(new File(tempFolder, fileName));
            });
        }
        try (InputStream inputStream = response.body().asInputStream();
             FileOutputStream outputStream = new FileOutputStream(fileReference.get())
        ) {
            StreamUtils.copy(inputStream, outputStream);
            System.out.println("文件下载成功:" + fileReference.get().getAbsolutePath());
        } catch (Exception e) {
            e.printStackTrace();
        }
    }
}
(文件下载接口示例演示)
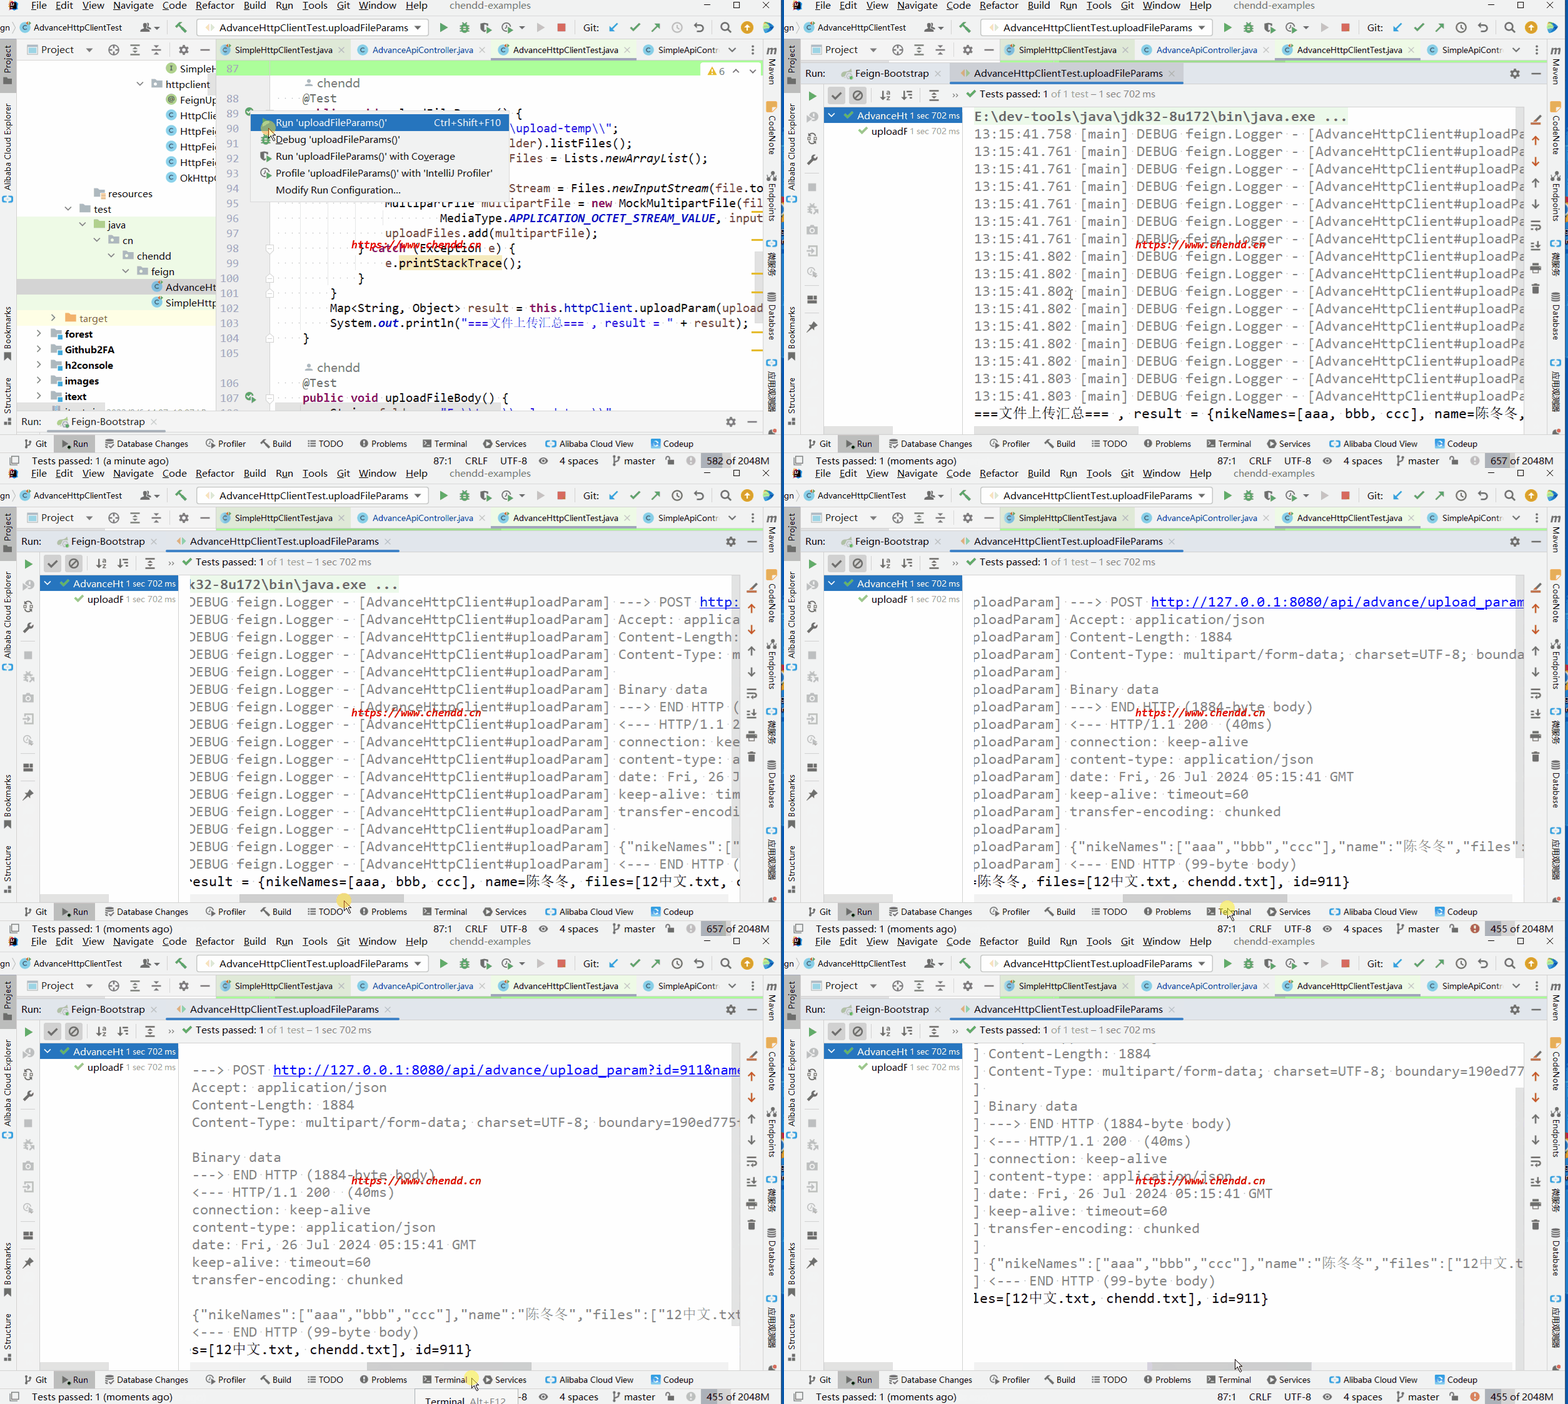
(3)测试第1种文件上传
@Test
public void uploadFileParams() {
    String folder = "E:\\temp\\upload-temp\\";
    File[] files = new File(folder).listFiles();
    List<MultipartFile> uploadFiles = Lists.newArrayList();
    for (File file : files) {
        try (InputStream inputStream = Files.newInputStream(file.toPath())) {
            MultipartFile multipartFile = new MockMultipartFile(file.getName() , file.getName() ,
                    MediaType.APPLICATION_OCTET_STREAM_VALUE, inputStream);
            uploadFiles.add(multipartFile);
        } catch (Exception e) {
            e.printStackTrace();
        }
    }
    Map<String, Object> result = this.httpClient.uploadParam(uploadFiles , 911 , "陈冬冬" , Arrays.asList("aaa" , "bbb" , "ccc"));
    System.out.println("===文件上传汇总=== , result = " + result);
}
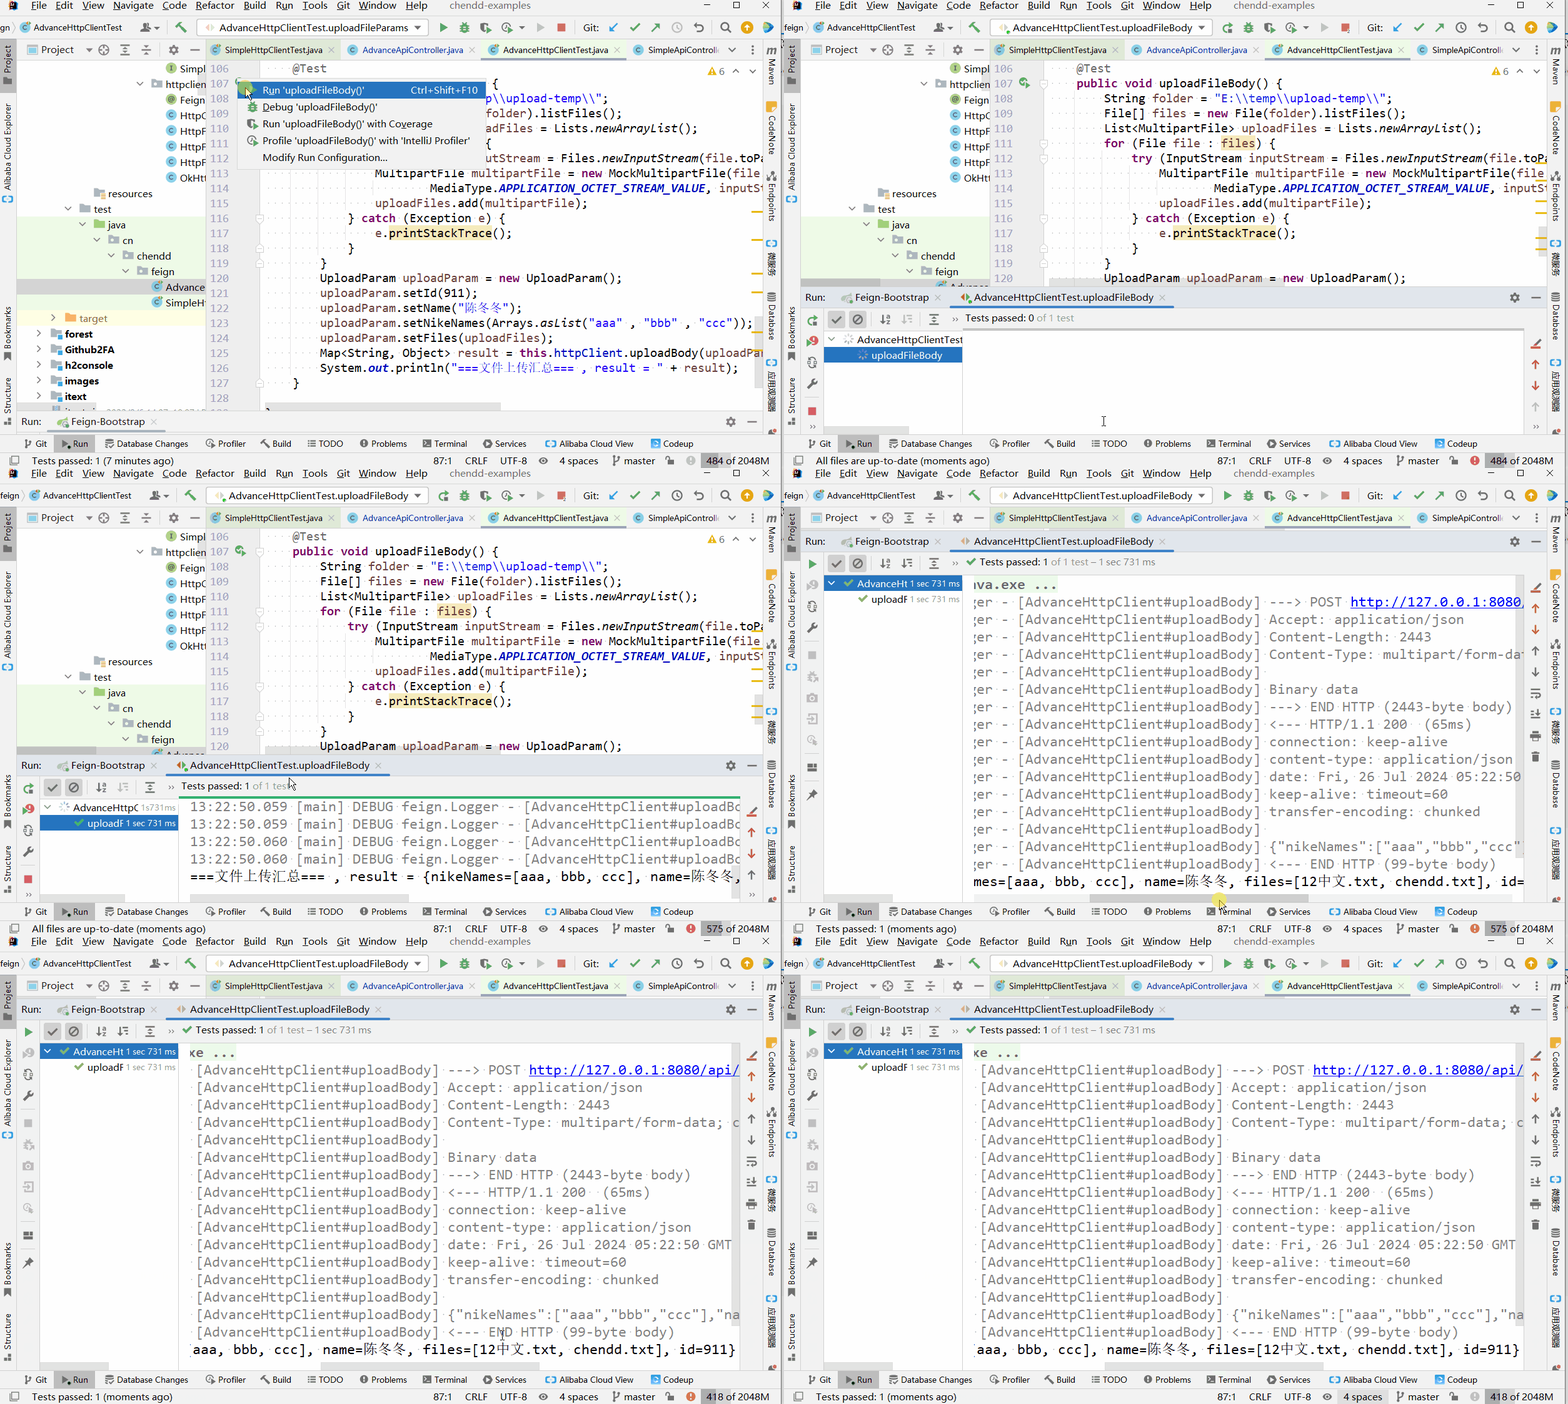
(4)测试第2种文件上传
@Test
public void uploadFileBody() {
    String folder = "E:\\temp\\upload-temp\\";
    File[] files = new File(folder).listFiles();
    List<MultipartFile> uploadFiles = Lists.newArrayList();
    for (File file : files) {
        try (InputStream inputStream = Files.newInputStream(file.toPath())) {
            MultipartFile multipartFile = new MockMultipartFile(file.getName() , file.getName() ,
                    MediaType.APPLICATION_OCTET_STREAM_VALUE, inputStream);
            uploadFiles.add(multipartFile);
        } catch (Exception e) {
            e.printStackTrace();
        }
    }
    UploadParam uploadParam = new UploadParam();
    uploadParam.setId(911);
    uploadParam.setName("陈冬冬");
    uploadParam.setNikeNames(Arrays.asList("aaa" , "bbb" , "ccc"));
    uploadParam.setFiles(uploadFiles);
    Map<String, Object> result = this.httpClient.uploadBody(uploadParam);
    System.out.println("===文件上传汇总=== , result = " + result);
}
(1)OpenFeign接口中的Spring MVC风格的调用并不是完全与Spring MVC的请求调用一致,反而更加严谨和规范,需要注意更多的细节规范;
(2)本篇文章主要演示了使用原生OpenFeign的文件下载和两种传参的文件上传的客户端与服务端的示例,称之为进阶示例;
(3)本系列文章也包含了常规基础接口的调用演示,同时也有使用spring-cloud-starter-openfeign的专业示例文章教程;
(4)工作中有使用到基于spring-cloud-starter-openfeign来使用OpenFeign的应有,同时也有使用Spring Boot来使用原生OpenFeign的应用,使用的是自定义注解HttpFeignClient实现,集成了Logger、Configuration等,非常丝滑;
(5)源码工程下载:《![]() 源码下载.zip》;
源码下载.zip》;
点赞


 欢迎来到陈冬冬的学习天地 | 学习与经验整理分享平台
