SpringBoot扫描包路径并注册接口为组件
admin 发布于:2024-07-25 09:58:40
阅读:loading
SpringBoot扫描包路径并注册接口为组件是日常工作中高级选手会接触和使用到,或者是封装一些功能性组件时会有接触,常规业务功能开发也许并不会涉及到自己编写,但一定会涉及到使用,比如MyBatis的Mapper、OpenFeign的Client、Spring Data Jpa的Repository等等,都是给定一个接口类,在接口类上标记注解或者在接口中的方法上标记注解,来实现特定的业务功能处理。
本期将新建一个纯净的Spring Boot项目,在此基础上构建项目示例,以非常专业的项目应用场景展开介绍,详细过程如下:
(1)新建启动类,标记启用扫码包路径
以OpenFeign为参考,定义启动类`Bootstrap`上增加启用扫码包路径开关的注解`EnableHelloClient`,并且声明需要扫码包路径的地址为`cn.chendd.**.clients`,也作为功能启用的标记,参考代码如下:
/**
 * 启动类
 *
 * @author chendd
 */
@SpringBootApplication
@EnableHelloClient(basePackages = {"cn.chendd.**.clients"})
public class Bootstrap {

    public static void main(String[] args) {
        SpringApplication.run(Bootstrap.class , args);
    }

}
(2)定义扫码开关注解
注解`EnableHelloClient`仅起到开关启用的目的,由它再导入Spring Boot中的导入包定义注册的自定义接口`ImportBeanDefinitionRegistrar`实现,根据扫码导入类的元素据进行包路径扫描,参考代码如下:
public class HelloClientRepositoryConfigurationSourceSupport implements ImportBeanDefinitionRegistrar {

    @SuppressWarnings("all")
    @Override
    public void registerBeanDefinitions(AnnotationMetadata importingClassMetadata, BeanDefinitionRegistry registry) {
        final MergedAnnotations annotations = importingClassMetadata.getAnnotations();
        String[] basePackages = null;
        for (MergedAnnotation<Annotation> annotation : annotations) {
            if (EnableHelloClient.class.equals(annotation.getType())) {
                final Object source = annotation.getSource();
                assert source != null;
                final EnableHelloClient httpFeignAnnotation = (EnableHelloClient) ((Class) source).getAnnotation(EnableHelloClient.class);
                basePackages = httpFeignAnnotation.basePackages();
            }
        }
        HelloClientScan scan = new HelloClientScan(registry);
        assert basePackages != null;
        scan.doScan(basePackages);
    }

}
(3)扫描包路径的具体实现
对于扫描到的包路径中的所有class进行按需过滤,比如只过滤接口并且接口标记了`HelloClient`注解,将满足条件的接口增加Spring的代理实现,并增加至Spring的容器中;不满足这两个条件的不进行注册;参考代码如下:
@Override
protected boolean isCandidateComponent(AnnotatedBeanDefinition beanDefinition) {
    AnnotationMetadata metadata = beanDefinition.getMetadata();
    return metadata.isInterface() && metadata.hasAnnotation(HelloClient.class.getName());
}

@Override
protected Set<BeanDefinitionHolder> doScan(String... basePackages) {
    this.addIncludeFilter((metadataReader , metadataReaderFactory) -> true);
    Set<BeanDefinitionHolder> beanDefinitionHolders = super.doScan(basePackages);
    for (BeanDefinitionHolder definitionHolder : beanDefinitionHolders) {
        ScannedGenericBeanDefinition beanDefinition = (ScannedGenericBeanDefinition) definitionHolder.getBeanDefinition();
        String beanClassName = beanDefinition.getBeanClassName();
        /// 设置bean工厂构造bean时的构造方法,即此处add所传递的参数类型则表示FactoryBean构造时所调用的构造函数
        /*beanDefinition.getConstructorArgumentValues().addGenericArgumentValue(new Object[]{beanClassName , Boolean.TRUE});
        try {
            beanDefinition.getConstructorArgumentValues().addGenericArgumentValue(Class.forName(beanClassName));
        } catch (ClassNotFoundException e) {
            e.printStackTrace();
        }*/
        beanDefinition.getConstructorArgumentValues().addGenericArgumentValue(beanClassName);
        beanDefinition.setBeanClass(HelloClientFactoryBean.class);
        beanDefinition.setAutowireMode(ScannedGenericBeanDefinition.AUTOWIRE_BY_TYPE);
    }
    return beanDefinitionHolders;
}
(4)定义组件注册
对于扫描包路径中符合条件的接口进行注册,将其按照Spring的规范进行组件定义,并且将其注入到Spring容器中;常见的设置有:组件是否单例、组件的对象构造,参考使用JDK动态代理实现的代码如下:
package cn.chendd.helloclient;

import org.springframework.beans.factory.FactoryBean;

import java.lang.reflect.Proxy;

/**
 * 组件创建工厂
 *
 * @author chendd
 */
public class HelloClientFactoryBean implements FactoryBean<Object> {

    /**此处省略一些其它非关键代码**/

    @Override
    public boolean isSingleton() {
        return true;
    }

    @Override
    public Object getObject() {
        HelloProxyHandler proxyHandler = new HelloProxyHandler(interfaceClass);
        return Proxy.newProxyInstance(ClassLoader.getSystemClassLoader() , new Class[]{interfaceClass} , proxyHandler);
    }

}
(5)定义接口代理实现类
本站由其它几篇文章对于动态代理的实现,比如给接口增加代理查询数据库的实现等,本次示例的重点不在动态代理上,重点在于标题中介绍的扫描接口,并注入Spring容器中,所以对于注入的接口实例方法的具体实现需使用代理生成方法的业务逻辑,参考代码如下:
package cn.chendd.helloclient;

import ...

/**
 * @author chendd
 */
public class HelloProxyHandler implements InvocationHandler {

    private final Class<?> interfaceClass;

    public HelloProxyHandler(Class<?> interfaceClass){
        this.interfaceClass = interfaceClass;
    }

    @SneakyThrows
    @Override
    public Object invoke(Object object, Method method, Object[] args) {

        if (method.equals(Object.class.getDeclaredMethod("equals", Object.class))) {
            return (Boolean) (object == args[0]);
        } else if (method.equals(Object.class.getDeclaredMethod("hashCode"))) {
            return (Integer) System.identityHashCode(object);
        } else if (method.equals(Object.class.getDeclaredMethod("toString"))) {
            return String.format("%s@%s" , interfaceClass.getSimpleName() , RandomStringUtils.randomAlphanumeric(8).toLowerCase());
        }

        final HelloClient helloClient = interfaceClass.getDeclaredAnnotation(HelloClient.class);
        if (args == null || args.length == 0) {
            return String.format("hello:%s,方法名称:%s,方法参数:无" , helloClient.value() , method.getName());
        }
        StringBuilder builder = new StringBuilder("hello:").append(helloClient.value())
                .append(",方法名称:").append(method.getName()).append(",方法参数:");
        for (Object arg : args) {
            builder.append(arg).append('、');
        }
        builder.deleteCharAt(builder.length() - 1);
        return builder.toString();
    }

}(1)定义实际业务方法的接口类,其中在类层面增加了自定义注解,也包含有3个方法,参考代码如下:
/**
 * 测试类
 *
 * @author chendd
 */
@HelloClient(value = "HelloWorldClient")
public interface HelloWorldClient {

    String sayHello();

    String sayHello(String name);

    String sayHello(String name , Double random);

}
(2)定义测试Junit,包含了使用@Autowire和@Resource的注入,以及使用SpringBeanFactory.getBean的方式来进行接口实例赋值,起到演示接口对象能够被正常注入的验证;
(3)定义测试Junit,包含注入上述接口的三个方法调用,输出动态代理类`HelloProxyHandler`中的方法实现,参考如下代码所示:
package cn.chendd.examples.hello;

import cn.chendd.comonents.SpringBeanFactory;
import cn.chendd.examples.BootstrapTest;
import cn.chendd.examples.hello.clients.HelloWorldClient;
import org.junit.Assert;
import org.junit.Before;
import org.junit.Test;
import org.springframework.beans.factory.annotation.Autowired;

import javax.annotation.Resource;

/**
 * 测试接口注入类
 *
 * @author chendd
 */
public class HelloWorldClientTest extends BootstrapTest {

    @Autowired
    private HelloWorldClient helloWorldClient1;
    @Resource
    private HelloWorldClient helloWorldClient2;
    private HelloWorldClient helloWorldClient3;

    @Before
    public void init() {
        helloWorldClient3 = SpringBeanFactory.getBean(HelloWorldClient.class);
    }

    @Test
    public void context() {
        Assert.assertEquals(helloWorldClient1, helloWorldClient2);
        Assert.assertEquals(helloWorldClient1, helloWorldClient3);
        System.out.println("调用无参数方法");
        System.out.println(helloWorldClient1.sayHello());
        System.out.println("调用1个参数方法");
        System.out.println(helloWorldClient1.sayHello("chendd"));
        System.out.println("调用2个参数方法");
        System.out.println(helloWorldClient1.sayHello("chendd" , Math.PI));
    }

}
(4)实例演示
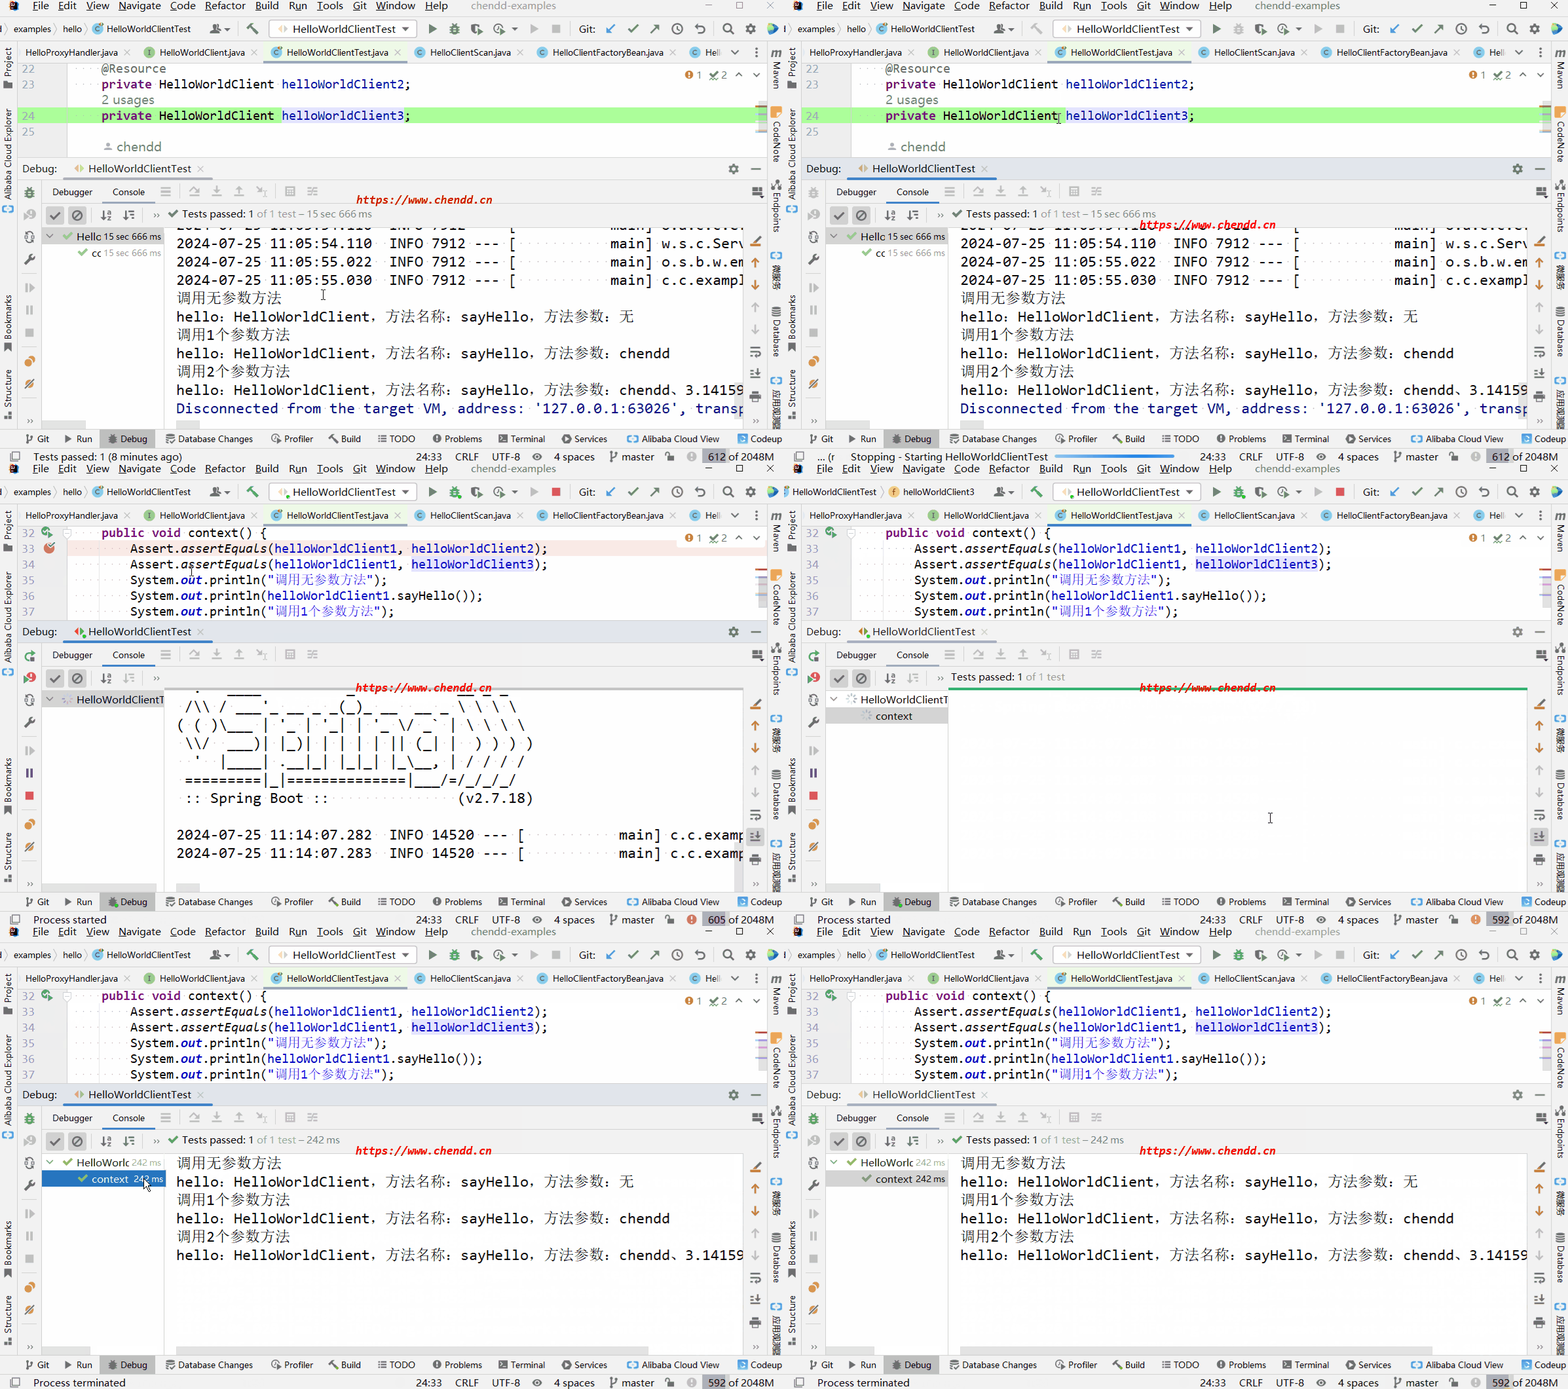
示例演示覆盖了三种形式获取到Spring容器的对象参数,并且验证了三个参数的对象一致(因为容器工厂生成使用的单例),并且输出了动态代理中的方法实现,参考过程如下图所示:

(1)接口的代理实现往往应该具有同样的业务逻辑,比如Jpa的所有方法都是面向数据库表的增删改查操作,又或者OpenFeign的所有方法都是作为HTTP接口调用的服务;
(2)接口方法在做对应的方法实现时,通常需要对返回值类型做兼容,比如Jpa的Repository需要对List<Pojo>、Pojo、Integer等类型都做了兼容,本次示例以简单为准,直接返回String结果(对方法的声明信息做返回);
(3)有相关的另一篇文章《Feign接口的原生应用》介绍的基于Feign的应用,也可以实现非常丝滑的接口包路径扫描并注入到Spring容器中,特别是Feign的代理实现对返回值做了兼容,以及返回值的泛型支持等;
(4)上述示例效果图为精简版,参考此处附件可下载运行更为全面的GIF效果图,由于图片稍大,使用附件下载的方式本地观看《![]() 示例演示-全量.gif》。
示例演示-全量.gif》。
(5)项目源码参考下载:《![]() 源码下载.zip》
源码下载.zip》
点赞


 欢迎来到陈冬冬的学习天地 | 学习与经验整理分享平台
