使用Spring创建注解的示例工程
Spring基本篇admin 发布于:2019-04-04 15:41:58
阅读:loading
最近一些时间总是有感于spring的拦截器实现日志功能的有待优化,也许是为了进一步的去实践idea开发,又或者是为了去学习spring的el表达式引擎,于是乎就使用全注解的方式搭建spring项目,一边尝试学习spel,一边尝试使用spel+aop再改进一版全局日志拦截的实现,于是乎就有了本篇章的相关文章,总结细分为下列具体的五篇:
(1)使用Spring创建注解的示例工程;
(2)Spring el表达式的入门使用及简单封装;
(3)Spring el表达式的进阶使用;
(4)三种Spring AOP记录日志的功能实现;
(5)自定义注解+Spring el实现的全局日志记录;
本文将围绕使用spring注解的方式创建工程,如果是在一个毫无外网和spring环境的机器上去搭建spring环境项目,使用注解无疑是最简单的方式,只需要简单的几个注解就可以了,具体的参考下列代码(这是我这么多年来的第一个全注解的spring示例工程):
Maven依赖(后续的json输出、aop、commons-lang等)
<dependency>
<groupId>junit</groupId>
<artifactId>junit</artifactId>
<version>4.11</version>
<scope>test</scope>
</dependency>
<dependency>
<groupId>org.springframework</groupId>
<artifactId>spring-expression</artifactId>
<version>4.3.20.RELEASE</version>
</dependency>
<dependency>
<groupId>org.springframework</groupId>
<artifactId>spring-aop</artifactId>
<version>4.3.20.RELEASE</version>
</dependency>
<dependency>
<groupId>org.springframework</groupId>
<artifactId>spring-context</artifactId>
<version>4.3.20.RELEASE</version>
</dependency>
<dependency>
<groupId>org.springframework</groupId>
<artifactId>spring-aspects</artifactId>
<version>4.3.20.RELEASE</version>
</dependency>
<dependency>
<groupId>junit</groupId>
<artifactId>junit</artifactId>
<version>4.12</version>
</dependency>
<dependency>
<groupId>org.apache.commons</groupId>
<artifactId>commons-lang3</artifactId>
<version>3.8</version>
</dependency>
<dependency>
<groupId>com.alibaba</groupId>
<artifactId>fastjson</artifactId>
<version>1.2.44</version>
</dependency>
创建SpringAppTest类
package cn.chendd;

import org.junit.Before;
import org.junit.Test;
import org.springframework.context.ApplicationContext;
import org.springframework.context.annotation.AnnotationConfigApplicationContext;
import org.springframework.context.annotation.ComponentScan;
import org.springframework.context.annotation.Configuration;
import org.springframework.context.annotation.EnableAspectJAutoProxy;

@Configuration
@EnableAspectJAutoProxy(proxyTargetClass = true)
@ComponentScan(value = {"cn.chendd.modules" , "cn.chendd.aops","cn.chendd.operation"})
public class SpringAppTest{

    private ApplicationContext context;

    @Before
    public void startup(){
        context = new AnnotationConfigApplicationContext(SpringAppTest.class);
        String beanNames[] = context.getBeanDefinitionNames();
        for (String beanName : beanNames) {
            System.out.println(beanName);
        }
    }

    protected <T> T getBean(Class<T> clazz){
        return context.getBean(clazz);
    }

    @Test
    public void sayHelloTest(){
        //运行此Test
    }
}
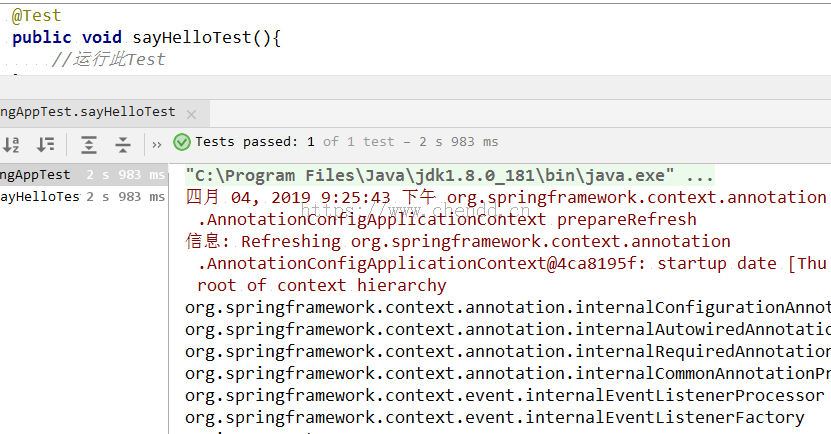
运行sayHelloTest的@Test输出@Before处打印内容,结果参考如下:

点赞


 欢迎来到陈冬冬的学习天地 | 学习与经验整理分享平台
